Cinnamon Roll Recipe | Bake Like A Pro
If there’s one thing that defines the smell of a great bakery, it’s the scent of warm cinnamon and yeast at 5:00 in the morning. But is there anything more disappointing than a dry, bready cinnamon roll? We’ve all been there–you spend hours waiting for the dough to rise, only to end up with something that needs a gallon of coffee just to swallow.
Get ready to meet your new favorite weekend tradition, grab your favorite rolling pin, and let’s turn your kitchen into the best smelling bakery on the block!
In the Snazy Sweets kitchen, I’ve been perfecting a cinnamon roll that isn’t just “good enough for at home” but cinnamon rolls that sell out every week I bring them to a farmers market. These cinnamon filled pastries are melt-in-your-mouth delicious, and stay soft for days to enjoy all week long!
For years, I was on a quest for the perfect roll. I tried every "quick" recipe on the internet, but they always lacked that deep, yeasty complexity you find in a true artisan bakery. I realized that if I wanted to sell these at my local farmers markets and have people coming back week after week, I had to stop cutting corners. This recipe didn't happen overnight; it was born from dozens of test batches, sticky countertops, and a lot of trial and error in the Snazy Sweets kitchen.
The breakthrough came when I stopped treating the dough like a standard loaf of bread and started treating it like a pastry. By introducing a long, intensive kneading process and a mandatory cold rest, I discovered how to create a dough that was strong enough to hold its shape but soft enough to pull apart with just two fingers. When you see these rolls sell out in the first hour of a market, it’s not just because they’re big—it’s because of that specific, pillowy texture that people can’t find anywhere else.
You might wonder why I knead this dough for a full 20 minutes or why I insist on a refrigerator chill. In the baking world, gluten is the architecture of your pastry. Since we are adding a significant amount of butter (which can usually weigh down a dough), we have to build a very strong "net" of gluten to trap the air bubbles. That 20-minute mix is what gives the roll its "rebound"—that springy, soft bite that doesn't just crumble when you touch it.
Then, there’s the cold rest factor. Chilling the dough isn't just about making it easier to handle (though it definitely helps with those clean, sharp spirals!). Chilling your dough slows down the yeast, keeping it from rising or proofing, and simultaneously allows the gluten to relax in your dough. Relaxed gluten is what makes rolling out your dough so much easier, not just being cold. It also allows the flour to fully hydrate, which is my number one secret for why these stay soft for days. While most rolls are drying out, these are still moisture-rich and gooey.
A great cinnamon roll is a balance of three distinct parts: the dough, the filling, and the icing. For the filling, I use a high ratio of cinnamon to brown sugar to ensure that every single layer—from the crispy edge to the legendary center—is packed with flavor. We don't just "sprinkle"; we create a thick, buttery paste that melts into the dough as it bakes, creating a caramelized bottom that is arguably the best part of the entire experience.
Finally, I crown them with a tangy Cream Cheese Frosting. Most people assume a frosting will make these overly sweet, but at Snazy Sweets, I add a touch of vanilla bean paste and a pinch of sea salt, and this cuts through the richness of the butter and sugar, making it a balanced experience. Whether you’re making these for a quiet Christmas morning or a busy Sunday brunch, you aren't just baking a recipe; you’re creating a memory that your family will ask for year after year.
So today, I’m sharing my personal “Holy Grail” recipe that I use to win over hundreds of people every farmers market season. The trick to these rolls isn’t actually a magic ingredient, it’s all about the patience in the process. I’ve simplified my professional process so you can get bakery-quality results right in your home! Whether you’re a beginner or a seasoned baker, this recipe will help you master that perfect center-of-the-roll texture every single time.
Ingredients
Dough
500 grams All-Purpose Flour
293 grams Whole Milk
43 grams Granulated Sugar
11 grams Salt
5 grams Instant Dry Yeast
100 grams Butter, Unsalted
Filling
140 grams Butter, Unsalted
140 grams Light Brown Sugar
14 grams Cinnamon
Frosting
220 grams Cream Cheese
110 grams Butter, Unsalted
220 grams Powdered Sugar
12 grams Vanilla Extract (or Paste)
4 grams Salt
Tools
Instructions
Phase 1: The Dough
Mix the Base: In a stand mixer fitted with the dough hook, combine the flour, milk, sugar, salt, and yeast. Mix on Low speed for about 5 minutes until a shaggy dough forms and no dry flour remains.
Incorporate the Butter: With the mixer still on Low, add the softened butter one tablespoon at a time. Once the butter is fully added, increase the speed to Medium-High.
The Long Knead: Mix for 20 minutes.
Bakery Tip: Don't panic! Halfway through, the dough will look like a sticky mess. Keep going—this long mix is what develops the gluten for that "pillowy" bakery texture. It’s finished when the dough is soft, smooth, and pulls away from the sides of the bowl.
The Chill: Transfer the dough to a piece of plastic wrap. Press it into a flat rectangle (this makes rolling easier later!), wrap it tightly, and refrigerate for 1-2 hours.
Phase 2: Filling & Rolling
Prep the Filling: In a small bowl, whisk together the brown sugar and cinnamon. Ensure your filling butter is very soft and spreadable.
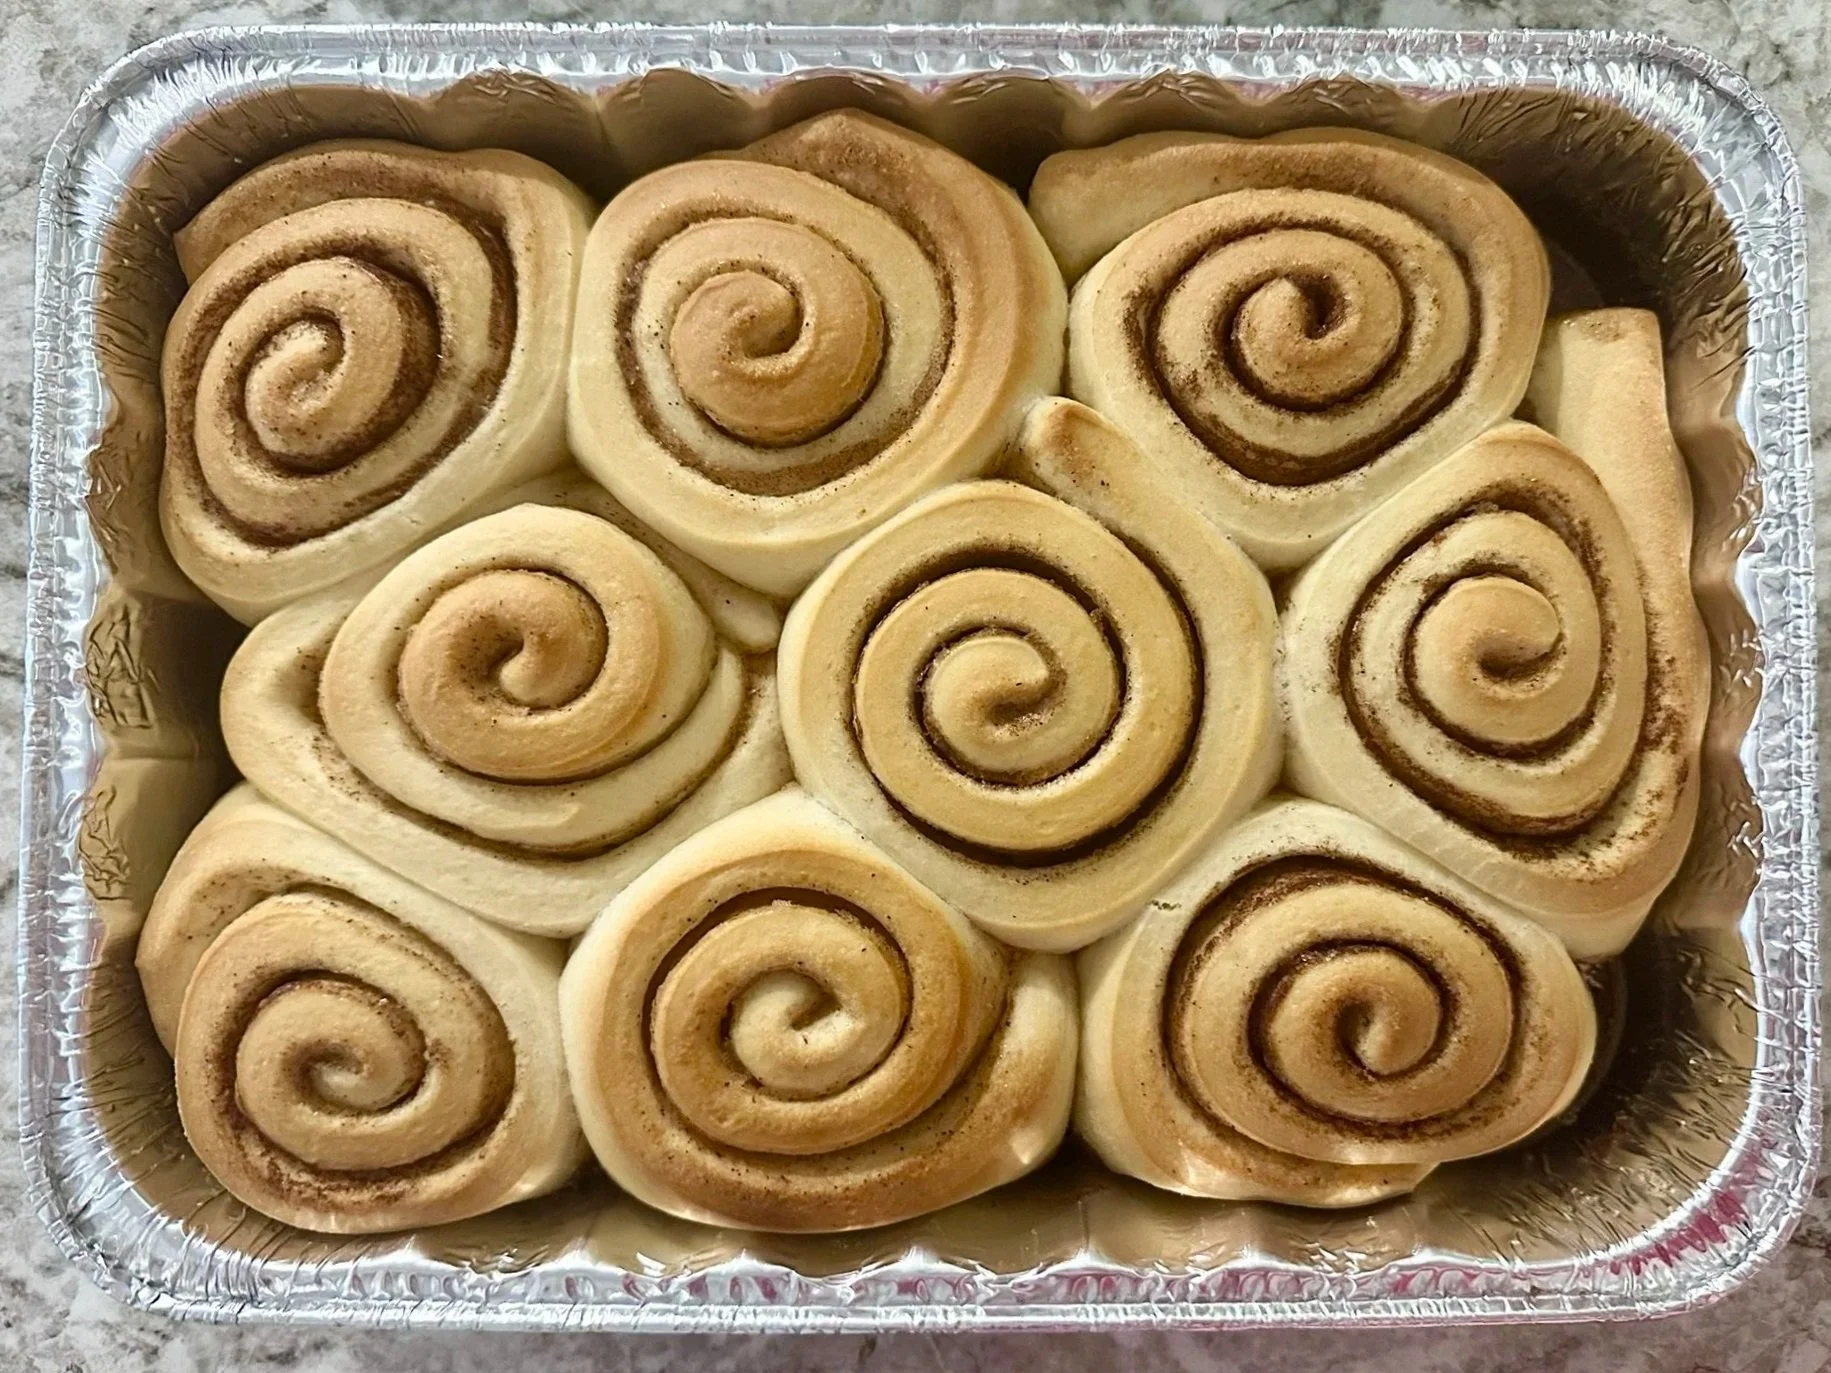
Roll it Out: On a lightly floured surface, roll the chilled dough into a 1/4-inch thick rectangle.
Pro-Tip: Keeping a sharp rectangular shape ensures every roll is the same size and bakes evenly.
Spread & Sprinkle: Using an offset spatula, spread the softened butter across the dough in sections. Sprinkle your cinnamon-sugar mixture evenly over the top, leaving a tiny margin at the very top edge to help the dough seal.
Phase 3: Portioning & Proofing
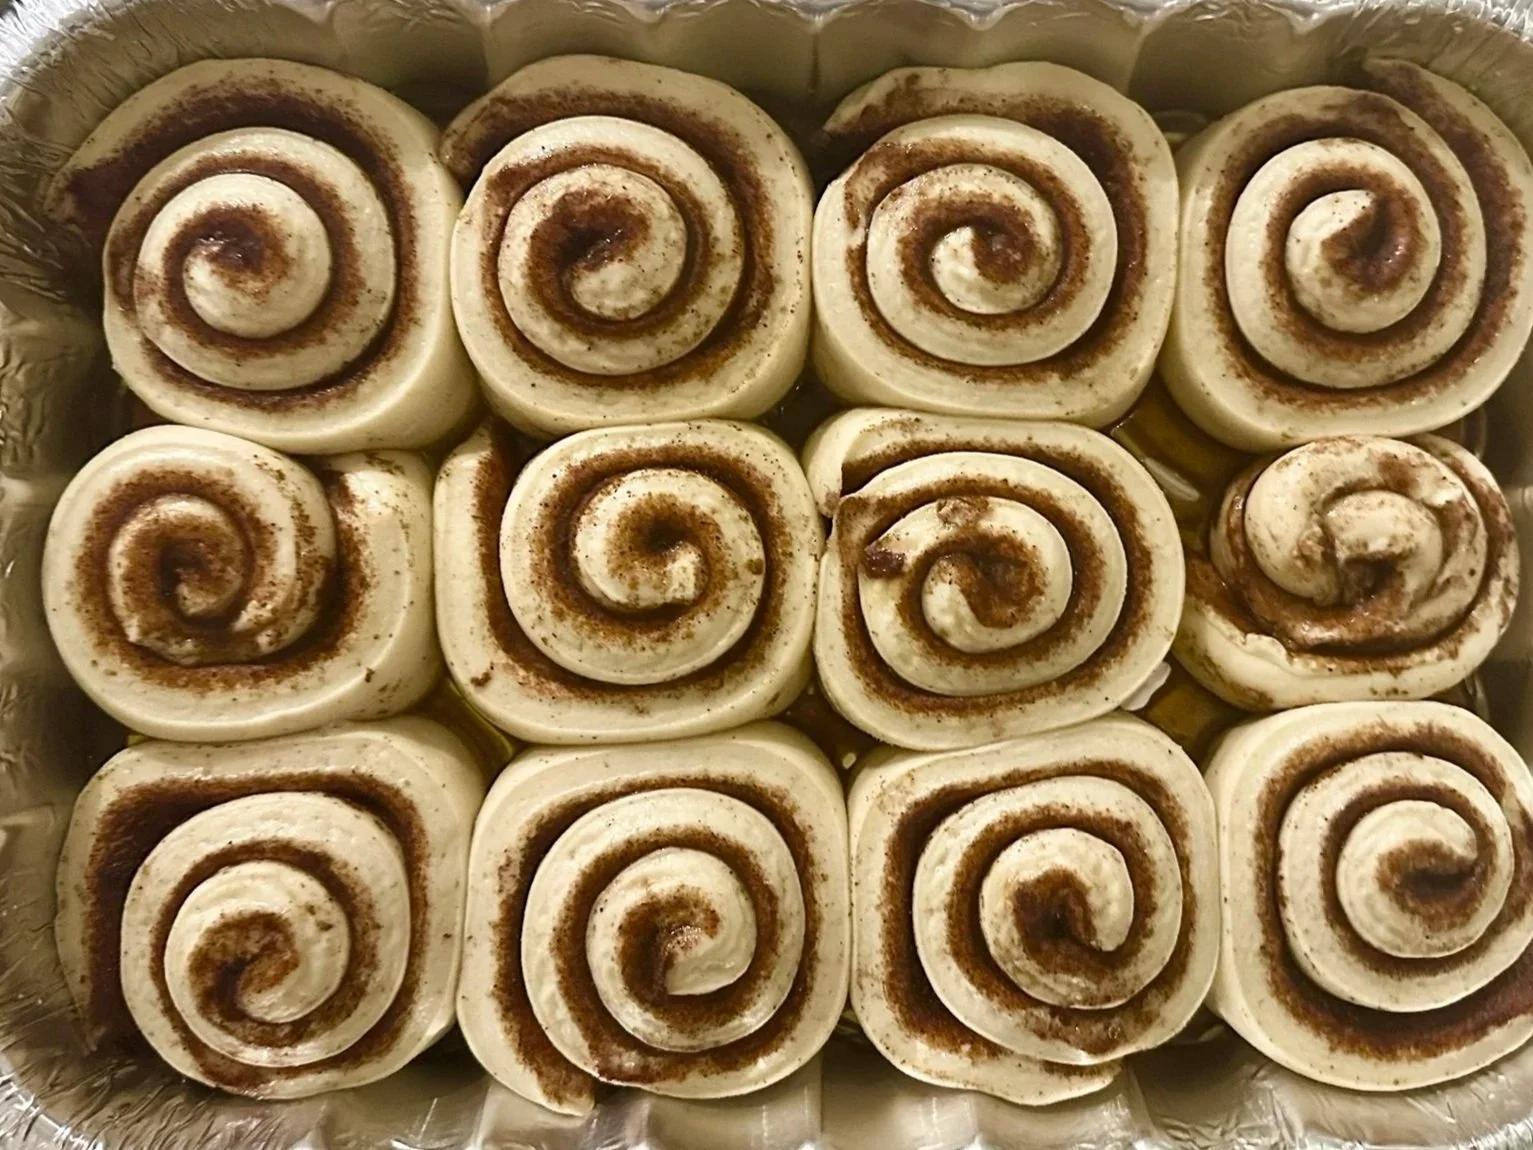
The "Ruler" Cut: Use a kitchen ruler and a pizza cutter to cut the dough into even strips (the width of your ruler).
The Roll-Up: Roll each strip tightly—be careful not to squish the dough or lose that precious filling!
The Final Proof: Place the rolls in a greased baking dish, leaving 1 to 1.5 inches of space between them. Cover with plastic wrap and let them rise in a warm spot until doubled in size (about 45–60 minutes).
Phase 4: Baking & Frosting
Bake: Preheat your oven to 350°F. Bake for 20–30 minutes. You’ll know they are done when the edges are lightly golden brown.
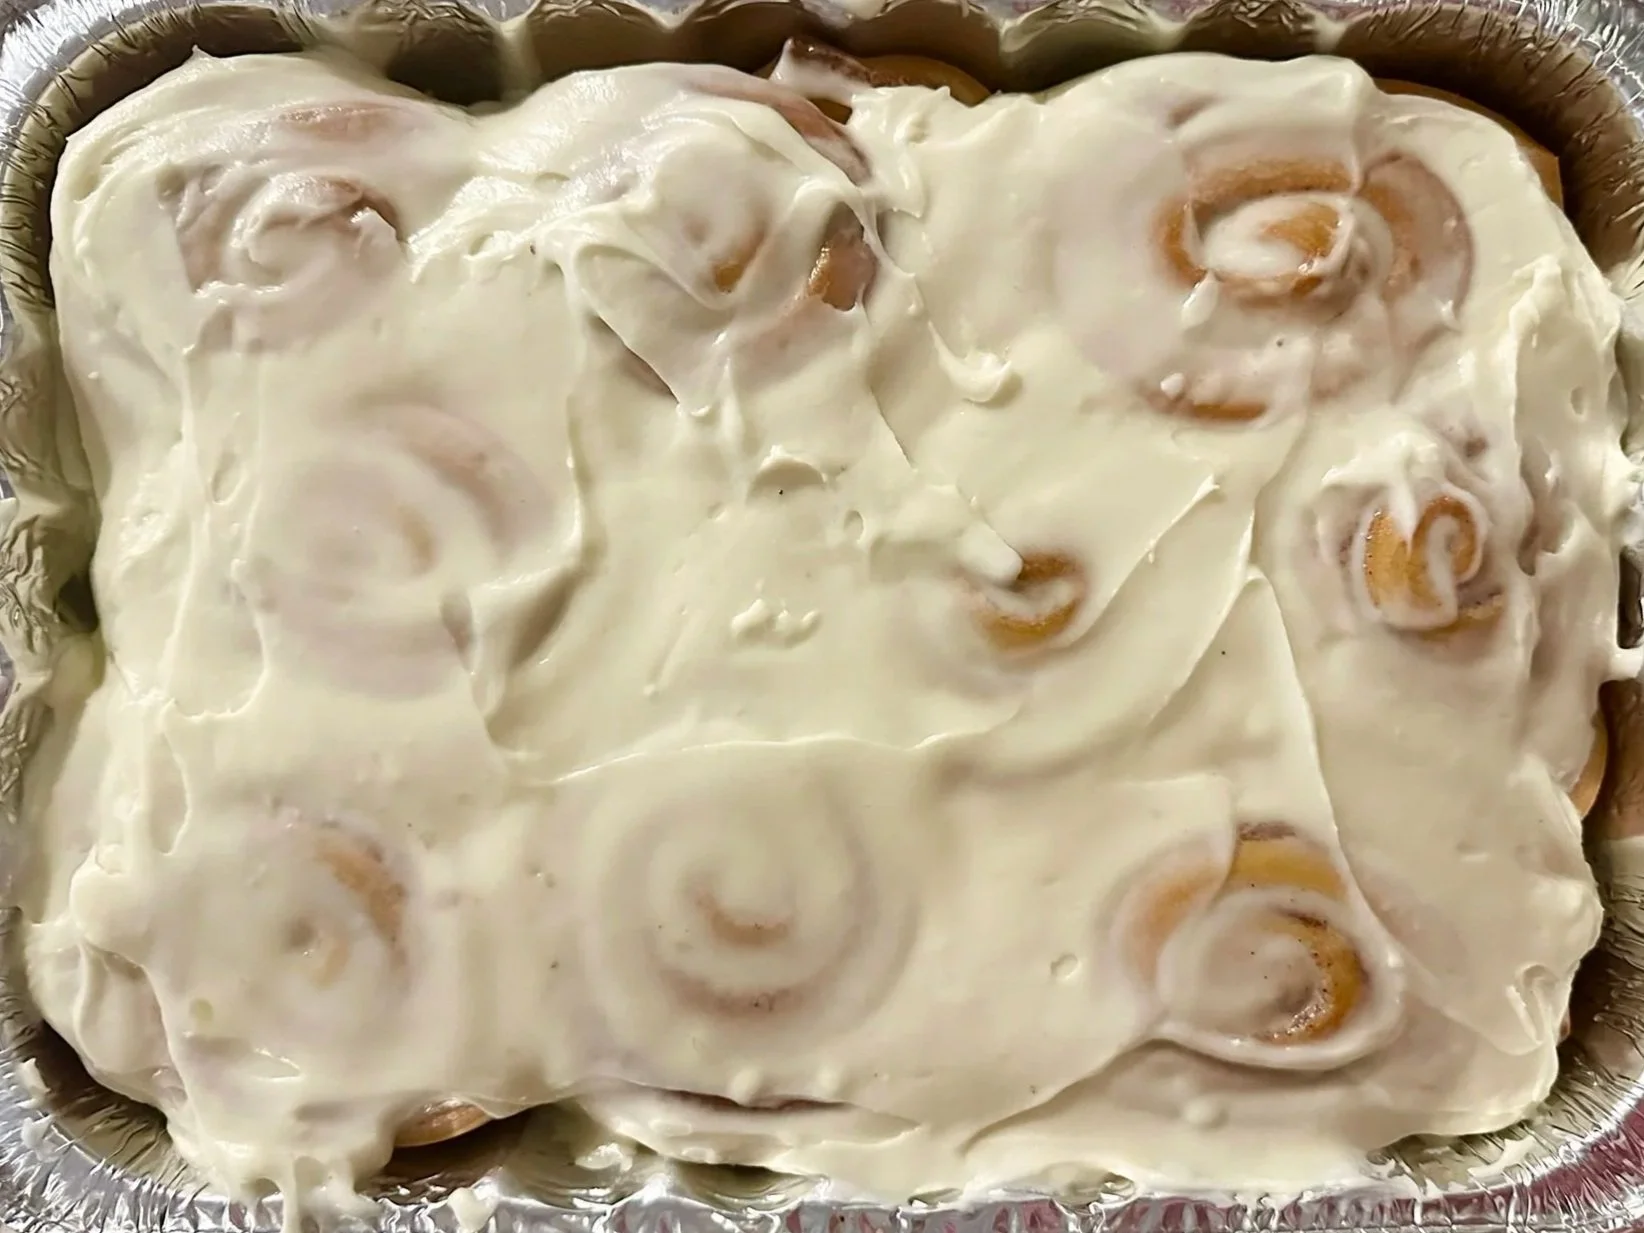
Whip the Frosting: While the rolls bake, cream the softened cream cheese and butter on High until fluffy. Add the powdered sugar, salt, and vanilla. Mix on Low until combined, then whip on Medium-High until light and airy.
Warning: Stop as soon as it's fluffy! Over-mixing can cause the frosting to break or curdle.
The Finishing Touch: Let the rolls cool for 15 minutes (this prevents the frosting from melting into a puddle). Spread a generous layer of frosting over the warm rolls and serve.
Pro Baking Tips!
Flour Choice Matters (Protein Content)
I use All-Purpose flour in this recipe because it keeps the rolls tender. If you switch to Bread Flour, you'll get a much chewier, 'bread-like' roll. If you like that New York Bagel-style chew, go for Bread Flour. If you want that soft, cake-like bakery bite, stick with All-Purpose!
The No-Squish Cutting Alternative
If you don't have a pizza cutter and find that a knife is squishing your beautiful spirals, use unflavored dental floss. Roll your dough into a log, slide the floss under the log, cross it over the top, and pull quickly. It slices through the dough without compressing those 1/4-inch layers you worked so hard to roll out!
Temperature is Everything
The #1 reason dough doesn't rise is that the milk was too hot and killed the yeast. Your milk should feel like lukewarm bathwater (about 100°F–105°F). If it’s hot to the touch, let it cool down before adding your yeast, or you'll have 'flat' rolls!
The Salty Secret
You'll notice I added salt to the frosting. Don't skip this! The salt cuts through the massive amount of sugar in the cream cheese frosting and actually makes the vanilla and cinnamon flavors 'pop' rather than just being 'sweet.'
The Overnight Strategy (Important!)
If you want fresh rolls for breakfast without the early wake-up call, you can use the Fridge Pause method. After you roll and cut your dough pieces and place them in the baking dish, cover them tightly with plastic wrap and put them in the fridge immediately.
Note: The fridge does not proof the rolls; it simply pauses the yeast. In the morning, you must take them out and let them sit in a warm spot for 1 to 4 hours to take the chill off and finish their final proof (doubling in size) before they go into the oven. Don't rush this—the rolls need to be fully proofed, puffy and room-temp before baking!